Inquire with any experienced painting expert about their secret, and they will reveal this: achieving a high-quality final paint finish relies 90% on preparation and 10% on application. Regardless of the paint’s cost or the steadiness of the hand, if the underlying surface is not adequately prepared, the paint will eventually crack, peel, or appear unsightly within a few months. Preparation serves as the unspoken assurance of quality. Although it can be messy and time-consuming, it is undeniably essential.
1. Drywall and Plaster: The Interior Canvas
Drywall requires meticulous care to achieve a smooth, professional finish.
Cleaning and Degreasing:
The Problem: Kitchens and bathrooms accumulate grease, smoke, and grime that prevent paint adhesion.
The Solution: Use Trisodium Phosphate (TSP) solution or a heavy-duty degreaser. Wash the entire surface, followed by a thorough rinse with clean water. If you skip the rinse, you’re just painting over residue.
Spackling and Patching:
The Problem: Nail holes, screw pops, and dings are common. Patching material shrinks as it dries, leading to sunken spots.
The Solution: Use appropriate spackle or joint compound in thin layers (two thin coats are better than one thick one). Allow each layer to dry completely, then sand smooth with fine-grit sandpaper ($180 – 220$ grit).
Feathering and Sanding:
The Problem: Uneven transitions between the old wall and new patches create visible “halos” or bumps.
The Solution: Feathering involves sanding the edges of the patch gradually outward until the repair blends seamlessly with the surrounding wall. Finish with a light, overall sanding to “key” the surface for better primer adhesion.
2. Masonry and Concrete: Dealing with Porosity and Chalk
Lorem ipsum dolor sit amet, consectetur adipiscing elit. Ut elit tellus, luctus nec ullamcorper mattis,
Exterior walls, foundations, and feature walls made of masonry (concrete, brick, stucco) are challenging due to alkalinity and high porosity.
Pressure Washing and Efflorescence Removal:
The Problem: Masonry holds dirt, mildew, and salts (known as efflorescence) which push paint away from the surface.
The Solution (Cleaning): Use a pressure washer to remove loose debris, dirt, and failing paint.
The Solution (Efflorescence): Scrub the white, chalky salt deposits with a stiff brush and a mild acid solution (like vinegar and water or a specialized cleaner) to neutralize the residue. Rinse thoroughly.
Crack Repair and Curing:
The Problem: Cracks are major entry points for water and will reappear through the new paint if not treated correctly.
The Solution: V-cut the crack open, clean it, and fill with an elastomeric (flexible) masonry sealant. It is absolutely vital to let the patch material cure completely before priming; otherwise, trapped moisture will cause the paint to fail.
dapibus leo.
3. Wood Surfaces: Tackling Tannin and Grain
Whether it’s interior trim or exterior siding, wood preparation requires managing moisture and natural wood compounds.
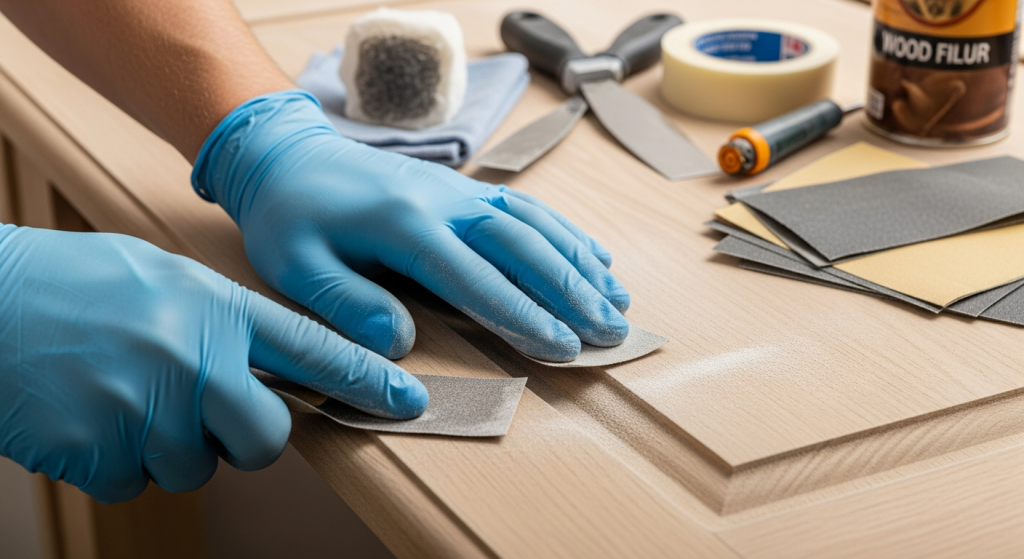
Deglossing and Sanding:
The Problem: Existing glossy paint prevents new paint from bonding, leading to chipping.
The Solution (Interior): Use a liquid deglosser or a light sanding with $220$-grit paper on glossy trim and doors. This creates a necessary “tooth” for the new paint to adhere to.
The Solution (Exterior): Scrape off all peeling paint until the edges are smooth. Power sanding may be needed on new or heavily weathered wood to flatten the grain.
Dealing with Tannin Bleed:
The Problem: Woods like cedar and redwood contain tannins that can leach out and stain the paint with yellow or brown streaks.
The Solution: Use a shellac-based primer or an oil-based primer. These primers seal the surface and lock the tannins in. Water-based primers will generally not block tannin bleed effectively.
4. The Crucial Step: Priming Strategy
Primer is not just “cheap paint”; it is a specialized adhesive layer that solves preparation problems that topcoat paint cannot. Choosing the right primer is as important as the topcoat itself.
Primer Recommendations by Surface Type
New Drywall / Patches
Use: PVA Primer (Polyvinyl Acetate)
Purpose: Seals the porous paper and joint compound to create a uniform surface and prevent “flashing.”
Stained or Heavy Odors
Use: Shellac-Based Primer
Purpose: Blocks severe stains and odors (e.g., water damage, smoke residue).
Masonry / Stucco
Use: Alkali-Resistant Primer
Purpose: Protects against high pH (alkalinity) in concrete that can damage regular paint.
Glossy Surfaces / Tile
Use: Bonding Primer
Purpose: Adheres to smooth, non-porous surfaces where normal paint would fail to stick.
Conclusion: A Prepared Surface is Your Renovation Guarantee
In the world of painting and renovation, surface preparation is the silent guarantee of quality. It’s messy, it’s dusty, and it often takes more time than the actual painting . But by diligently addressing the specific needs of drywall, masonry, and wood before the brush even touches the can, you minimize the risk of expensive do-overs. Think of the preparation stage as building a fortress for your new paint—strong, stable, and ready to withstand the test of time. A professionally prepared surface ensures your newly renovated space will look spectacular, not just on day one, but for years to come. Don’t rush the 90%; it’s what truly makes the 10% shine!